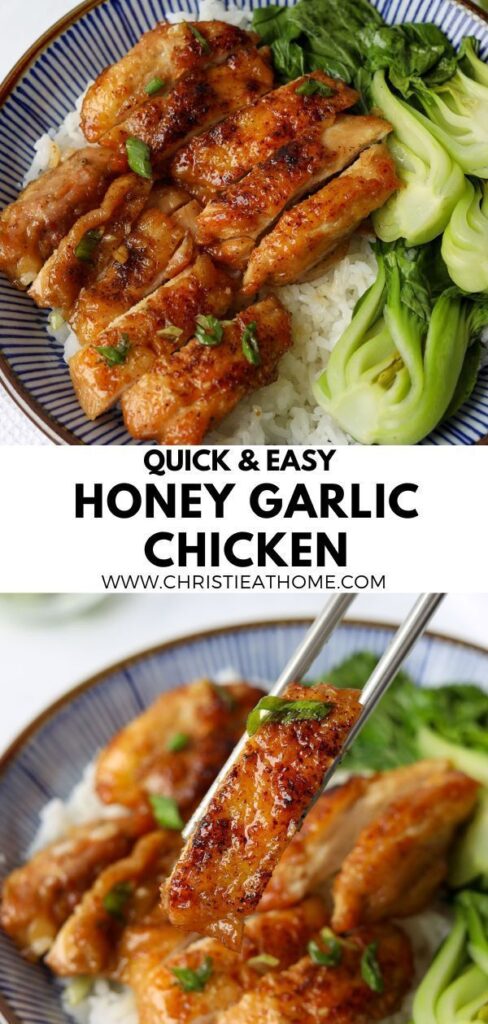
There is a certain kind of evening where the day has asked a lot of you, and the last thing you want is a complicated dinner. This Easy & Quick Honey Garlic Chicken was born on one of those evenings. I stood at the stove with a single pan, a few pantry staples, and a quiet intention: make something warm and honest without turning the kitchen into a project. Twenty minutes later, the sauce was bubbling at the edges and the whole house smelled like garlic and honey, and I remembered that simple food can still feel like care.
Advertisements1
Honey garlic chicken works because of balance. The honey caramelizes into a glossy glaze, the soy and vinegar keep it from turning cloying, and the garlic hums underneath it all. As you cook, notice the sound shifting from a sharp sizzle to a softer, stickier simmer. That sound is your cue, not the clock. If you can stay curious instead of precise, you will enjoy this far more.
Before you begin, take one slow breath and let your shoulders drop. You do not need to be a perfect cook tonight. You only need to be present for ten focused minutes at the pan. That is enough. Breathe, reflect, grow.
Why You'll Love This Recipe
About the Ingredients
6 boneless, skinless chicken thighs (about 1.5 lb / 680 g), trimmed
Thighs stay juicy and forgiving; if you prefer leaner, use 4 boneless skinless chicken breasts (about 1.5 lb / 680 g) and reduce the sear by 2 minutes. Look for thighs of even thickness so they cook at the same rate.
1 teaspoon kosher salt
Kosher salt seasons gently and evenly; if using fine table salt, start with 3/4 teaspoon since it is much denser. Season the chicken 10 minutes ahead if you have the time.
1/2 teaspoon freshly ground black pepper
Freshly ground pepper tastes brighter than pre-ground. If you only have pre-ground, use 1/4 teaspoon so it does not dominate the glaze.
2 tablespoons olive oil
Olive oil handles the sear without smoking too early; avocado oil works beautifully too. If using butter instead, add it after searing to avoid burning.
6 cloves garlic, finely minced (about 2 tablespoons)
Fresh garlic is essential here; jarred garlic tastes flatter and slightly sour. If you love a milder bite, use 4 cloves instead of 6.
1/3 cup honey (about 113 g)
Clover or wildflower honey gives a clean sweetness; darker buckwheat honey is bolder and can overpower the soy. For a vegan version, swap in maple syrup.
1/4 cup low-sodium soy sauce (60 ml)
Low-sodium keeps the glaze from turning salty as it reduces; tamari is a great gluten-free substitute. Coconut aminos work too, but add 1/4 teaspoon salt.
2 tablespoons rice vinegar (30 ml)
Rice vinegar is mild and slightly sweet; apple cider vinegar is a fine substitute but use 1 1/2 tablespoons since it is sharper. Fresh lemon juice also works in a pinch.
1 tablespoon cornstarch whisked into 2 tablespoons cold water
This slurry thickens the glaze into a clinging sauce; arrowroot starch or tapioca starch substitute one-for-one. Always whisk it into cold water first so it does not clump.
2 scallions, thinly sliced, plus 1 teaspoon toasted sesame seeds for serving
Scallions add freshness and crunch; chives or thinly sliced red onion are good swaps. Toast sesame seeds in a dry pan for 60 seconds to wake up their aroma.
Tips & Tricks
Do Not Crowd the Pan
Overlapping chicken steams instead of sears, so work in two batches if your skillet is smaller than 12 inches. You want golden brown, not gray.
Add the Garlic Late
Garlic burns in seconds and turns bitter, so stir it in only after the chicken is seared and the pan has come down slightly in heat.
Let the Glaze Reduce, Not Boil Away
A gentle simmer for 3 to 4 minutes gives you a syrupy sauce; a rolling boil can scorch the honey. Pull the pan off the heat the moment it coats the back of a spoon.
Rest Before Slicing
Five minutes of rest keeps the juices inside the meat instead of on the cutting board. This is the difference between juicy and dry.
Pro Tips
Step-by-Step Instructions
1. Pat and Season the Chicken
Pat the thighs dry with paper towels, then season both sides with the kosher salt and black pepper. Let them sit at room temperature for 10 minutes while you measure the sauce, which helps them cook evenly.
2. Whisk the Honey Garlic Sauce
In a small bowl, whisk the honey, soy sauce, rice vinegar, and minced garlic until fully combined. Set the cornstarch slurry aside separately so it stays cold until needed.
3. Sear Until Golden
Heat the olive oil in a 12-inch skillet over medium-high heat, about 375 F (190 C), until it shimmers. Lay the chicken in a single layer and sear 5 to 6 minutes per side until deeply golden brown and the internal temperature reads 165 F (74 C).
4. Lower the Heat and Add Garlic Sauce
Reduce the heat to medium-low, then pour in the honey garlic mixture, scraping up the browned bits from the bottom of the pan. Simmer gently for 3 to 4 minutes, stirring occasionally, until the sauce begins to bubble at the edges and smells fragrant.
5. Thicken the Glaze
Give the cornstarch slurry a quick stir, then drizzle it into the pan while stirring. Cook 1 to 2 minutes more, until the sauce coats the back of a spoon and clings to the chicken rather than running off.
6. Rest the Chicken
Move the chicken to a cutting board and let it rest 5 minutes. Spoon a little of the warm glaze over the top so the surface stays glossy while the juices settle.
7. Slice and Serve
Slice the chicken against the grain into half-inch pieces, return it to the pan, and toss gently to coat. Scatter the scallions and toasted sesame seeds over the top and serve right away.
Delicious Variations
Spicy Honey Garlic
Add 1 to 2 teaspoons of sriracha or chili garlic sauce with the honey for a warm, rounded heat.
Honey Garlic Chicken Thighs and Broccoli
Toss 3 cups of broccoli florets into the pan during the last 5 minutes of simmering so they soak up the glaze.
Lemon Honey Garlic
Replace the rice vinegar with 2 tablespoons fresh lemon juice and finish with lemon zest for a brighter, summery version.
How to Store Easy & Quick Honey Garlic Chicken
Refrigerator
Store cooled leftovers in an airtight container in the refrigerator for up to 4 days. The glaze thickens when cold, which is completely normal.
Freezer
Freeze the cooled chicken and sauce in a freezer-safe container for up to 3 months. Thaw overnight in the refrigerator before reheating so the texture stays tender.
Reheating
Reheat gently in a covered skillet over medium-low heat, about 300 F (150 C), for 5 to 7 minutes, adding a splash of water if the glaze tightens. The microwave works in 30-second bursts, but the stovetop keeps the chicken juicier.
Frequently Asked Questions
Q: Can I use chicken breasts instead of thighs?
Yes, boneless skinless chicken breasts work well, but they dry out faster, so sear them 4 to 5 minutes per side and pull them at 165 F (74 C). Because breasts are leaner, the honey glaze helps keep them moist. If they are very thick, pound them to an even 3/4-inch thickness first.
Q: Why did my honey garlic sauce burn or turn bitter?
Honey burns quickly at high heat, so the sauce should always be added after you lower the burner to medium-low. If the garlic was added at the start, it likely scorched, which is where the bitterness comes from. Add garlic with the liquid instead and keep the simmer gentle.
Q: How do I make the sauce thicker?
A cornstarch slurry is the most reliable thickener, whisked into cold water and stirred in at the end for 1 to 2 minutes. If you would rather avoid cornstarch, simmer the sauce 2 to 3 minutes longer so the honey reduces naturally. Either way, the sauce should coat a spoon before you pull the pan off the heat.
Q: Is honey garlic chicken gluten free?
Not as written, because standard soy sauce contains wheat, but you can make it gluten free by swapping in tamari or a certified gluten-free soy sauce. Rice vinegar and honey are naturally gluten free, so that is the only change needed. Always check your labels if you are cooking for someone with celiac disease.
Q: What should I serve with honey garlic chicken?
Steamed jasmine rice, coconut rice, or cauliflower rice all work beautifully to soak up the glaze, and a crisp cucumber salad balances the sweetness. Roasted broccoli or green beans also round out the plate nicely. If you want something faster, warm naan or crusty bread does the job.
I hope this Easy & Quick Honey Garlic Chicken becomes one of those dinners you make without thinking, the kind that quietly takes care of you on a long day. Make it once, adjust the honey or garlic to your own taste, and let it become yours. Breathe, reflect, grow.
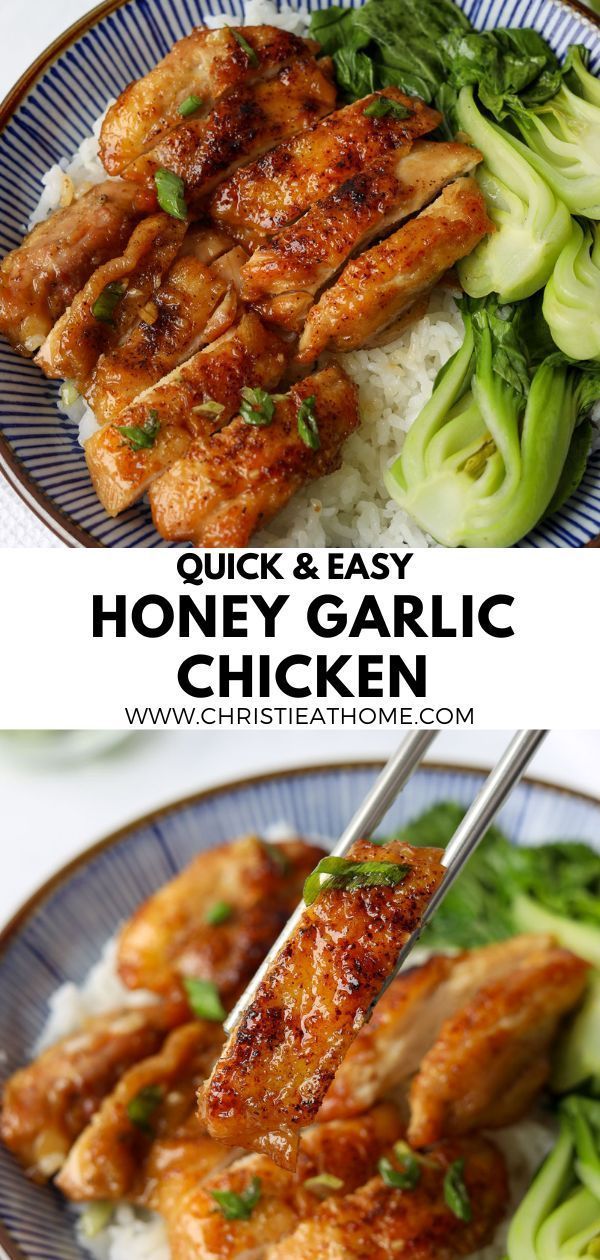
Easy & Quick Honey Garlic Chicken
Easy & Quick Honey Garlic Chicken is sticky, golden, and ready in one pan, turning ordinary weeknights into something you actually look forward to.
🧂 Ingredients
- 6 boneless, skinless chicken thighs (about 1.5 lb / 680 g), trimmed
- 1 teaspoon kosher salt
- 1/2 teaspoon freshly ground black pepper
- 2 tablespoons olive oil
- 6 cloves garlic, finely minced (about 2 tablespoons)
- 1/3 cup honey (about 113 g)
- 1/4 cup low-sodium soy sauce (60 ml)
- 2 tablespoons rice vinegar (30 ml)
- 1 tablespoon cornstarch whisked into 2 tablespoons cold water
- 2 scallions, thinly sliced, plus 1 teaspoon toasted sesame seeds for serving
📋 Instructions
- 1Pat and Season the Chicken — Pat the thighs dry with paper towels, then season both sides with the kosher salt and black pepper. Let them sit at room temperature for 10 minutes while you measure the sauce, which helps them cook evenly.
- 2Whisk the Honey Garlic Sauce — In a small bowl, whisk the honey, soy sauce, rice vinegar, and minced garlic until fully combined. Set the cornstarch slurry aside separately so it stays cold until needed.
- 3Sear Until Golden — Heat the olive oil in a 12-inch skillet over medium-high heat, about 375 F (190 C), until it shimmers. Lay the chicken in a single layer and sear 5 to 6 minutes per side until deeply golden brown and the internal temperature reads 165 F (74 C).
- 4Lower the Heat and Add Garlic Sauce — Reduce the heat to medium-low, then pour in the honey garlic mixture, scraping up the browned bits from the bottom of the pan. Simmer gently for 3 to 4 minutes, stirring occasionally, until the sauce begins to bubble at the edges and smells fragrant.
- 5Thicken the Glaze — Give the cornstarch slurry a quick stir, then drizzle it into the pan while stirring. Cook 1 to 2 minutes more, until the sauce coats the back of a spoon and clings to the chicken rather than running off.
- 6Rest the Chicken — Move the chicken to a cutting board and let it rest 5 minutes. Spoon a little of the warm glaze over the top so the surface stays glossy while the juices settle.
- 7Slice and Serve — Slice the chicken against the grain into half-inch pieces, return it to the pan, and toss gently to coat. Scatter the scallions and toasted sesame seeds over the top and serve right away.

Sofia writes about mindfulness and mental well-being, drawing from her own journey with stress and burnout. She shares gentle, evidence-informed practices for busy lives.