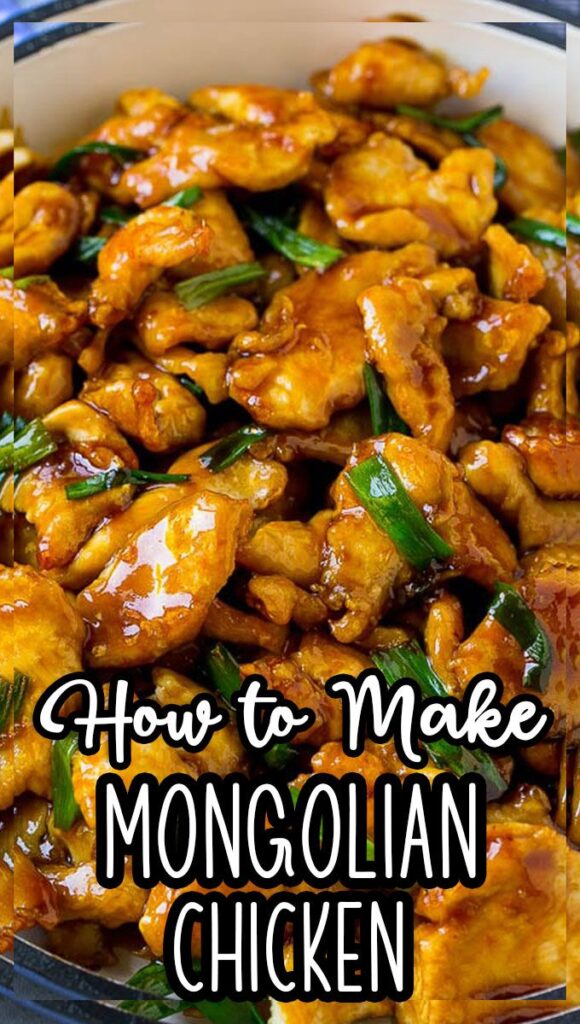
Mongolian Chicken is not actually from Mongolia. It is a Chinese-American takeout invention, and the version worth making at home is a fast stir-fry of velveted chicken thighs in a sweet-savory soy, garlic, and ginger glaze. The main takeaway: you can beat delivery on time, cost, and texture with one skillet and a bowl of sauce you mix before the pan gets hot.
Advertisements1
Here is the money math. A 6-serving batch costs roughly the same as two takeout containers, and each serving lands around 285 calories with 12 grams of protein. That is a better return per dollar than almost any delivery order, and you control the sugar, salt, and heat.
The whole job comes down to two moves: sear the chicken hard so it browns instead of steaming, then reduce the sauce until it coats the back of a spoon. Nail those and you get the glossy, clingy texture that makes takeout Mongolian beef and chicken so addictive.
Why You'll Love This Recipe
About the Ingredients
2 lbs (900g) boneless, skinless chicken thighs, cut into 1-inch pieces
Thighs stay juicy under high heat; if you only have breasts, cut them the same size and shave 2 minutes off the sear. Buy thighs labeled air-chilled if available, they hold less added water and brown better.
1/4 cup (30g) cornstarch
This is what creates the crust. Arrowroot or potato starch works as a 1:1 swap, but tapioca starch gets gummy, so avoid it here.
3 tbsp (45ml) neutral oil, divided
Peanut or canola handle high heat without smoking. Olive oil will burn at searing temperature, so save it for another job.
1/3 cup (80ml) low-sodium soy sauce
Low-sodium keeps the glaze from turning salty after reduction. Tamari is a solid gluten-free substitute with a slightly deeper flavor.
1/4 cup (60ml) water
Cuts the sodium and lets the sauce reduce without scorching. Use the same amount of unsalted chicken broth for a richer base.
3 tbsp (40g) packed dark brown sugar
Dark brown brings molasses depth. Light brown or coconut sugar works, but the glaze will be a shade lighter and less complex.
2 tbsp (30ml) hoisin sauce
Adds body and a fermented sweetness. If you skip it, add 1 extra teaspoon brown sugar and 1 teaspoon rice vinegar.
1 tbsp (15ml) toasted sesame oil
Toasted, not regular, or the flavor disappears. A little goes far, so measure it rather than pouring.
5 cloves garlic, minced (about 1 tbsp)
Fresh garlic beats jarred every time here. If using jarred, double the amount since it is milder.
1 tbsp fresh ginger, grated
Freeze the knob first and it grates into fine shreds with no stringy fibers. Ground ginger is a last resort at 1/2 teaspoon.
1/2 tsp red pepper flakes
Controls the heat. For a milder dish use 1/4 teaspoon; for takeout-level heat use 3/4 teaspoon.
4 scallions, sliced, whites and greens separated
The whites go in early for aroma, the greens finish the plate. Thin spring onions or chives are fine substitutes.
Tips & Tricks
Dry the chicken before coating
Pat the pieces completely dry with paper towels, then toss in cornstarch. Wet chicken steams and the coating slides off, which is the number one cause of soggy Mongolian chicken.
Sear in batches, never crowd
A 12-inch skillet holds about half the chicken at once. Crowding drops the pan temperature and you get gray, steamed meat instead of golden-brown crust.
Finish off the heat
Pull the pan off the burner before tossing in the scallion greens. Residual heat wilts them without turning them limp and gray.
- Mix the sauce before you turn on the heat: Soy, water, brown sugar, hoisin, and sesame oil should be whisked and sitting next to the stove. Once the garlic hits the pan you have seconds, not minutes, before it burns.
Pro Tips
Step-by-Step Instructions
1. Prep the chicken
Pat the chicken pieces bone dry, then toss them in a bowl with the cornstarch until every piece wears a chalky white coat. Let them sit 5 minutes while you mix the sauce, this brief rest helps the coating adhere.
2. Whisk the sauce
In a small bowl, whisk the soy sauce, water, brown sugar, hoisin, and sesame oil until the sugar dissolves. Set it within arm's reach of the stove.
3. Heat the skillet
Set a 12-inch skillet over medium-high heat and add 2 tablespoons of the oil. Wait until the oil shimmers and a piece of chicken dropped in sizzles immediately, roughly 375F (190C).
4. Sear the chicken
Add half the chicken in a single layer and cook 3 to 4 minutes per side, until deeply golden brown and the internal temperature reads 165F (74C). The pieces should release easily from the pan. Transfer to a plate and repeat with the remaining oil and chicken.
5. Bloom the aromatics
Lower the heat to medium, add the remaining 1 tablespoon oil, then the garlic, ginger, pepper flakes, and scallion whites. Stir constantly for 30 seconds, until fragrant but not browned. Burnt garlic turns the whole sauce bitter.
6. Reduce the sauce
Pour in the sauce mixture and bring it to a boil, scraping up the browned bits. Simmer 3 to 4 minutes, until the sauce thickens enough to coat the back of a spoon and bubbles at the edges.
7. Toss and glaze
Return the chicken and any collected juices to the pan and toss for 1 to 2 minutes over medium heat, until every piece is lacquered and glossy. The sauce should cling, not run.
8. Finish and serve
Kill the heat, fold in the scallion greens, and rest 2 minutes. Serve over steamed jasmine rice with extra pepper flakes on the side.
Delicious Variations
Mongolian Beef
Swap the chicken for thinly sliced flank steak and sear only 2 minutes per side, keeping it medium-rare.
Spicy Mongolian Chicken
Add 1 tablespoon chili garlic sauce and 1 teaspoon sriracha to the sauce for a serious kick.
Vegetable Mongolian
Replace the chicken with 6 cups mixed broccoli, bell pepper, and snap peas, stir-frying 4 minutes before adding the sauce.
How to Store Mongolian Chicken
Refrigerator
Store in an airtight container up to 4 days. The glaze thickens cold, so reheat with a splash of water.
Freezer
Freeze up to 3 months in a freezer-safe bag, pressed flat. Thaw overnight in the refrigerator before reheating.
Reheating
Reheat in a skillet over medium heat for 4 to 5 minutes with 1 tablespoon water, or microwave covered in 30-second bursts until steaming. The skillet keeps the edges crisp.
Frequently Asked Questions
Q: Is Mongolian chicken actually from Mongolia?
No, it is a Chinese-American restaurant invention, not a traditional Mongolian dish. The name likely comes from the bold, sweet-savory flavor profile associated with Mongolian barbecue restaurants. The sauce itself is closer to a Chinese stir-fry glaze than anything from Mongolia.
Q: Can I make Mongolian chicken gluten-free?
Yes, swap the soy sauce for tamari and use a gluten-free hoisin or make your own with gluten-free soy sauce. Cornstarch is naturally gluten-free, so the coating needs no change. Double-check your hoisin label, since many brands contain wheat.
Q: Why did my sauce turn out too thick or too sticky?
Your heat was too high during the reduction or you simmered it too long. The sauce thickens dramatically as it cools, so pull it off the heat when it coats a spoon but still drips slowly. If it is already too thick, whisk in warm water 1 tablespoon at a time.
Q: Can I use chicken breast instead of thighs?
Yes, but breasts dry out faster under high heat. Cut them into 1-inch pieces, sear only 2 to 3 minutes per side, and pull them at 165F (74C). Tossing them back into the sauce briefly at the end keeps them from overcooking.
Q: What do I serve with Mongolian chicken?
Steamed jasmine or white rice is the classic pairing because it soaks up the glaze. For a lighter plate, try cauliflower rice, steamed broccoli, or rice noodles. A crisp cucumber salad cuts the sweetness nicely.
Mix the sauce before the pan gets hot, sear in batches, and reduce until the glaze clings. That is the whole game, and it beats delivery on cost and texture every time. Make your money work for you.
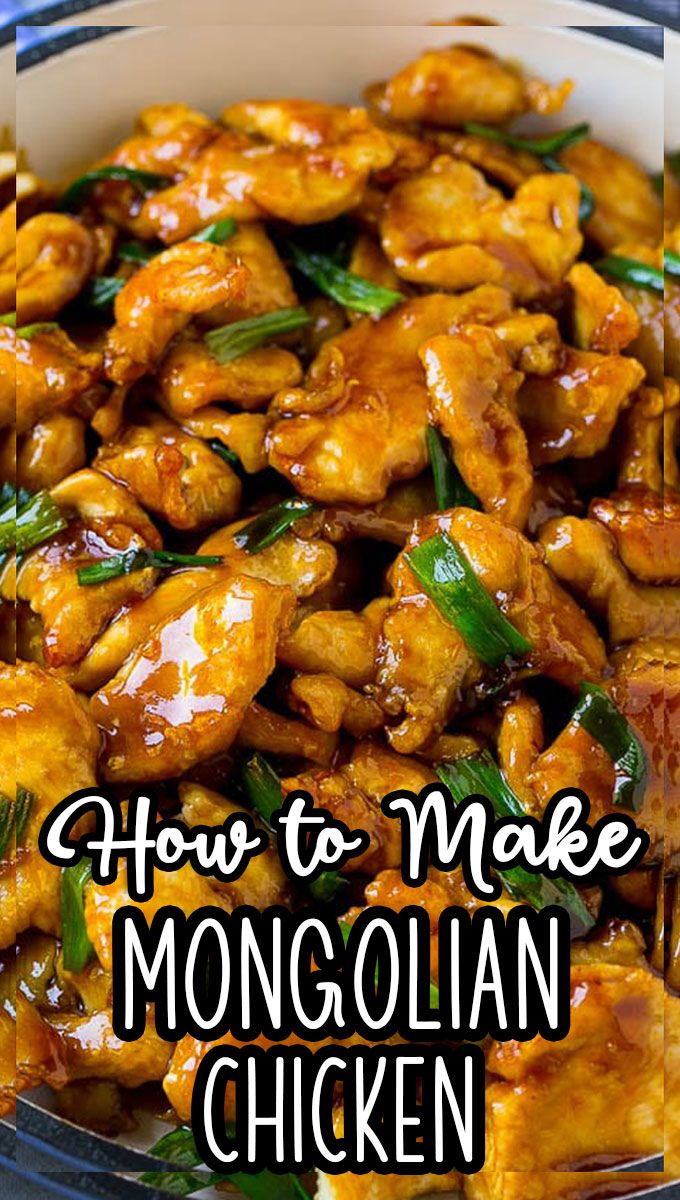
Mongolian Chicken
Mongolian Chicken is sticky-sweet, garlicky, and ready in 35 minutes, with crispy pan-seared chicken coated in a glossy soy-ginger sauce.
🧂 Ingredients
- 2 lbs (900g) boneless, skinless chicken thighs, cut into 1-inch pieces
- 1/4 cup (30g) cornstarch
- 3 tbsp (45ml) neutral oil, divided
- 1/3 cup (80ml) low-sodium soy sauce
- 1/4 cup (60ml) water
- 3 tbsp (40g) packed dark brown sugar
- 2 tbsp (30ml) hoisin sauce
- 1 tbsp (15ml) toasted sesame oil
- 5 cloves garlic, minced (about 1 tbsp)
- 1 tbsp fresh ginger, grated
- 1/2 tsp red pepper flakes
- 4 scallions, sliced, whites and greens separated
📋 Instructions
- 1Prep the chicken — Pat the chicken pieces bone dry, then toss them in a bowl with the cornstarch until every piece wears a chalky white coat. Let them sit 5 minutes while you mix the sauce, this brief rest helps the coating adhere.
- 2Whisk the sauce — In a small bowl, whisk the soy sauce, water, brown sugar, hoisin, and sesame oil until the sugar dissolves. Set it within arm's reach of the stove.
- 3Heat the skillet — Set a 12-inch skillet over medium-high heat and add 2 tablespoons of the oil. Wait until the oil shimmers and a piece of chicken dropped in sizzles immediately, roughly 375F (190C).
- 4Sear the chicken — Add half the chicken in a single layer and cook 3 to 4 minutes per side, until deeply golden brown and the internal temperature reads 165F (74C). The pieces should release easily from the pan. Transfer to a plate and repeat with the remaining oil and chicken.
- 5Bloom the aromatics — Lower the heat to medium, add the remaining 1 tablespoon oil, then the garlic, ginger, pepper flakes, and scallion whites. Stir constantly for 30 seconds, until fragrant but not browned. Burnt garlic turns the whole sauce bitter.
- 6Reduce the sauce — Pour in the sauce mixture and bring it to a boil, scraping up the browned bits. Simmer 3 to 4 minutes, until the sauce thickens enough to coat the back of a spoon and bubbles at the edges.
- 7Toss and glaze — Return the chicken and any collected juices to the pan and toss for 1 to 2 minutes over medium heat, until every piece is lacquered and glossy. The sauce should cling, not run.
- 8Finish and serve — Kill the heat, fold in the scallion greens, and rest 2 minutes. Serve over steamed jasmine rice with extra pepper flakes on the side.

Diego covers personal finance for freelancers and gig workers, with a focus on budgeting, taxes, and retirement planning. He breaks down complex money topics into simple, step-by-step guides.