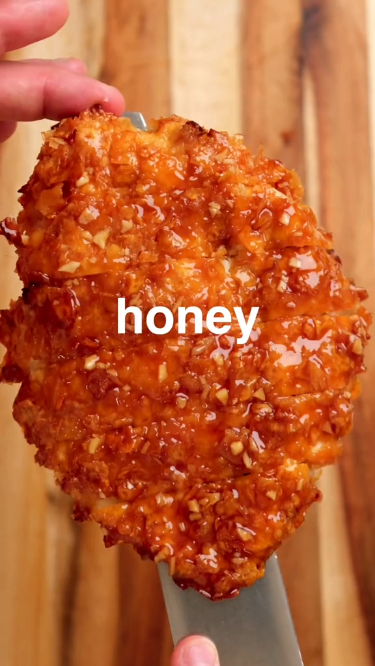
I first built this Garlic Honey Crispy Chicken Rice Bowl out of a camp stove necessity on a cold night outside Flagstaff, and it has been in my rotation ever since. The idea is simple: get chicken thighs truly crisp in a hot skillet, then glaze them in a garlic honey sauce that clings to every craggy edge.
Advertisements1
Here is the thing most folks get wrong at home: they crowd the pan and the chicken steams instead of crisping. Give the pieces space, let them sit undisturbed until deeply golden, and you get that restaurant-style crunch without a deep fryer.
The sauce comes together in about ninety seconds and thickens into a glossy lacquer that soaks just enough into the rice. It is weeknight-fast, pantry-friendly, and honestly good enough that I have made it three times in one week. Get out there and explore.
Why You'll Love This Recipe
About the Ingredients
2 lb (900g) boneless skinless chicken thighs, cut into 1 1/2-inch chunks
Thighs stay juicy and crisp far better than breast here. If you only have chicken breast, cut it the same size but shorten the sear by about 1 minute per side so it does not dry out.
3 tbsp cornstarch
Cornstarch is the secret to that glassy, crunchy crust. Arrowroot or potato starch works as a 1:1 substitute if that is what you have.
1 1/2 tsp kosher salt
Diamond Crystal kosher salt is what I use; if you are on fine table salt, cut it to 1 tsp. Sea salt flakes work too but crush them first.
1/2 tsp freshly ground black pepper
Fresh-cracked pepper tastes noticeably brighter than pre-ground. A cheap pepper mill is one of the best five-dollar upgrades in the kitchen.
1/4 cup (85g) honey
Clover or wildflower honey keeps the flavor neutral; buckwheat honey is too assertive for this sauce. Maple syrup is a solid vegan swap.
3 tbsp low-sodium soy sauce
Low-sodium lets you control the salt. Tamari or coconut aminos are great gluten-free alternatives that behave the same way.
2 tbsp rice vinegar
Rice vinegar is milder than white vinegar. Apple cider vinegar works in a pinch, but use 1 tbsp since it is sharper.
5 cloves garlic, finely minced
Fresh garlic is non-negotiable for that punchy aroma. Jarred garlic is fine in a rush, but use 1 tbsp and add it a few seconds later so it does not burn.
1 tbsp grated fresh ginger
A microplane makes quick work of this. If you are out, 1 tsp ground ginger stirred into the sauce works as a backup.
2 tbsp neutral oil, such as canola or avocado
High smoke point matters for the sear. Do not use olive oil here; it will smoke and taste bitter at this heat.
4 cups (about 720g) cooked jasmine rice, for serving
Day-old rice reheats best and stays fluffy. Short-grain or brown rice both work, though brown rice needs a splash more sauce.
3 scallions, thinly sliced, plus 1 tsp toasted sesame seeds
Scallions add freshness and crunch. Toasted sesame seeds are the classic finish; toasted peanuts are a great swap for texture.
Tips & Tricks
- Pat the chicken bone-dry before dredging. Surface moisture is the number one reason chicken steams instead of crisping, so blot it well with paper towels and let it sit for 10 minutes.
- Sear in two batches if your skillet is smaller than 12 inches. Overcrowding drops the pan temperature and you lose that golden crust entirely.
- Whisk the sauce before it hits the pan. Honey sinks and settles, so a quick whisk recombines everything and prevents a clump of pure honey at the bottom.
- Pull the pan off the heat before adding the sauce. Honey scorches fast above 350F (177C), so residual heat is plenty to thicken the glaze without burning it.
Pro Tips
Step-by-Step Instructions
1. Prep and dredge chicken
Pat the chicken chunks thoroughly dry, then toss them in a bowl with cornstarch, kosher salt, and black pepper until every piece wears a thin, even white coat. Let them sit 10 minutes so the coating hydrates and sticks.
2. Mix the honey garlic sauce
In a small bowl, whisk together the honey, soy sauce, rice vinegar, minced garlic, and grated ginger until smooth. Set it within arm's reach of the stove, because once the chicken is seared you move fast.
3. Sear the first batch
Heat 1 tbsp oil in a 12-inch skillet over medium-high until it shimmers, about 2 minutes, or 375F (190C) on an infrared thermometer. Add half the chicken in a single layer and cook undisturbed 4 minutes, then flip and cook 3 to 4 minutes more until deeply golden brown and the internal temperature reads 175F (79C).
4. Sear the second batch
Move the first batch to a plate and repeat with the remaining oil and chicken, another 7 to 8 minutes total. The pieces should look craggy and crisp and sound like gravel when you stir them.
5. Bloom the aromatics
Reduce the heat to medium-low and pour off all but 1 tbsp of fat. Add the garlic and ginger and stir constantly for 20 to 30 seconds until fragrant but not browned, which keeps the sauce sweet rather than bitter.
6. Glaze and toss
Pour in the honey soy mixture and simmer 60 to 90 seconds until it bubbles at the edges and coats the back of a spoon. Return all the chicken and toss for 30 seconds until each piece gleams with a sticky lacquer.
7. Build the bowls
Spoon 2/3 cup cooked jasmine rice into each bowl, pile the glazed chicken on top, and finish with scallions and toasted sesame seeds. Serve immediately while the crust is still audible.
Delicious Variations
Spicy Gochujang Version
Whisk 1 tbsp gochujang into the sauce and skip the rice vinegar for a fiery Korean-style bowl.
Air Fryer Crispy Chicken
Dredge the chunks, air fry at 400F (204C) for 12 minutes shaking halfway, then toss in the stovetop glaze.
Honey Garlic Cauliflower Bowl
Swap the chicken for 5 cups cauliflower florets, roast at 425F (218C) for 25 minutes, then glaze for a vegetarian take.
How to Store Garlic Honey Crispy Chicken Rice Bowl
Refrigerator
Store cooled chicken and rice separately in airtight containers for up to 4 days. Keeping them apart stops the rice from turning soggy under the glaze.
Freezer
Freeze the glazed chicken alone for up to 2 months in a freezer bag, pressed flat. The rice freezes well too, but the crisp texture will soften noticeably.
Reheating
Reheat the chicken in a 375F (190C) oven or air fryer for 6 to 8 minutes to bring back some crunch. Avoid the microwave, which turns the glaze rubbery.
Frequently Asked Questions
Q: Why is my crispy chicken not crispy?
Your pan was not hot enough or it was overcrowded. Sear in batches over medium-high heat at 375F (190C) and leave the pieces undisturbed so a crust can form before you flip them.
Q: Can I use chicken breast instead of thighs?
Yes, but cut it into the same 1 1/2-inch chunks and shorten the sear slightly. Breast dries out faster, so pull it at 165F (74C) internal temperature rather than 175F (79C).
Q: How do I keep the honey sauce from burning?
Add the sauce off the heat or over medium-low, and never let it boil hard. Honey scorches above 350F (177C), so 60 to 90 seconds of gentle bubbling is all it needs to thicken.
Q: Is this Garlic Honey Crispy Chicken Rice Bowl gluten free?
Only if you swap the soy sauce for tamari or coconut aminos. Everything else in the recipe, including the cornstarch and rice vinegar, is naturally gluten free.
Q: What rice goes best with honey garlic chicken?
Jasmine rice is my pick because its light floral aroma balances the sticky sauce. Short-grain sushi rice or brown rice both work, though brown rice soaks up more glaze so you may want extra sauce.
Give this Garlic Honey Crispy Chicken Rice Bowl a shot this week and let me know how the crust turned out in the comments. If you want more one-skillet trail-tested dinners, subscribe and share it with a friend who is stuck in a chicken rut. Get out there and explore.
Garlic Honey Crispy Chicken Rice Bowl
Garlic Honey Crispy Chicken Rice Bowl delivers sticky-sweet, garlicky chicken with shatter-crisp edges over fluffy rice in one easy skillet dinner.
🧂 Ingredients
- 2 lb (900g) boneless skinless chicken thighs, cut into 1 1/2-inch chunks
- 3 tbsp cornstarch
- 1 1/2 tsp kosher salt
- 1/2 tsp freshly ground black pepper
- 1/4 cup (85g) honey
- 3 tbsp low-sodium soy sauce
- 2 tbsp rice vinegar
- 5 cloves garlic, finely minced
- 1 tbsp grated fresh ginger
- 2 tbsp neutral oil, such as canola or avocado
- 4 cups (about 720g) cooked jasmine rice, for serving
- 3 scallions, thinly sliced, plus 1 tsp toasted sesame seeds
📋 Instructions
- 1Prep and dredge chicken — Pat the chicken chunks thoroughly dry, then toss them in a bowl with cornstarch, kosher salt, and black pepper until every piece wears a thin, even white coat. Let them sit 10 minutes so the coating hydrates and sticks.
- 2Mix the honey garlic sauce — In a small bowl, whisk together the honey, soy sauce, rice vinegar, minced garlic, and grated ginger until smooth. Set it within arm's reach of the stove, because once the chicken is seared you move fast.
- 3Sear the first batch — Heat 1 tbsp oil in a 12-inch skillet over medium-high until it shimmers, about 2 minutes, or 375F (190C) on an infrared thermometer. Add half the chicken in a single layer and cook undisturbed 4 minutes, then flip and cook 3 to 4 minutes more until deeply golden brown and the internal temperature reads 175F (79C).
- 4Sear the second batch — Move the first batch to a plate and repeat with the remaining oil and chicken, another 7 to 8 minutes total. The pieces should look craggy and crisp and sound like gravel when you stir them.
- 5Bloom the aromatics — Reduce the heat to medium-low and pour off all but 1 tbsp of fat. Add the garlic and ginger and stir constantly for 20 to 30 seconds until fragrant but not browned, which keeps the sauce sweet rather than bitter.
- 6Glaze and toss — Pour in the honey soy mixture and simmer 60 to 90 seconds until it bubbles at the edges and coats the back of a spoon. Return all the chicken and toss for 30 seconds until each piece gleams with a sticky lacquer.
- 7Build the bowls — Spoon 2/3 cup cooked jasmine rice into each bowl, pile the glazed chicken on top, and finish with scallions and toasted sesame seeds. Serve immediately while the crust is still audible.

Liam writes about outdoor adventure and gear, focusing on budget-friendly options and safety. He tests equipment in real conditions and shares honest assessments for hikers and campers.