I treat weeknight cooking like a system: fewer moving parts, predictable timing, repeatable results. This Crispy Honey Garlic Chicken is exactly that kind of build. You need one skillet, a cutting board, and about thirty minutes from a cold pan to a plated dinner. The method is simple but the sequence matters, and I will walk you through it step by step.
Advertisements1
The core idea is a two-stage cook. First you sear bite-sized chicken in a thin layer of oil until the cutlets are deeply golden and release easily from the pan. Then you lower the heat, add a honey-soy-garlic glaze, and let it bubble and thicken until it coats the back of a spoon. That contrast, crisp exterior and glossy sweet-savory sauce, is what makes this dish feel like takeout without the delivery wait.
If you have a digital thermometer and a timer, you already have the two tools that matter most here. Everything else is muscle memory you will build after two or three rounds.
Why You'll Love This Recipe
About the Ingredients
2 lb (900g) boneless, skinless chicken thighs, cut into 1 1/2-inch pieces
Thighs stay juicy under high heat; if you prefer breast, use 1 3/4 lb (800g) and reduce the sear by 1 minute per side. Buy thighs labeled air-chilled if you can, they brown more evenly.
1 1/2 tsp kosher salt
Kosher salt dissolves faster and seasons more evenly than table salt; if using fine table salt, drop to 1 tsp. A flaky sea salt like Maldon works as a finishing sprinkle instead.
1/2 tsp freshly cracked black pepper
Pre-ground pepper loses aroma within weeks; a cheap manual grinder outperforms any shaker. White pepper is a fine swap if you want less visible fleck.
3 tbsp cornstarch
Cornstarch is the secret to that shattering crust; arrowroot or potato starch work identically here. Do not substitute flour, it steams instead of crisping.
3 tbsp neutral oil, such as avocado or canola
High smoke point matters at this temperature; olive oil will smoke and turn bitter. Peanut oil is a traditional wok choice if you have it.
6 cloves garlic, finely minced, about 2 tbsp
Fresh garlic only here, jarred paste burns and tastes flat. A microplane gives you a finer mince that distributes through the glaze without clumping.
1/3 cup (113g) honey
Clover or wildflower honey is neutral and reliable; buckwheat honey is too assertive for this glaze. For a vegan version, swap in agave syrup one-to-one.
3 tbsp low-sodium soy sauce
Low-sodium keeps the glaze from turning salty after reduction; tamari is the gluten-free equivalent. Coconut aminos work but need 1 extra teaspoon of honey to balance.
1 tbsp rice vinegar
The acid cuts the sweetness and keeps the glaze glossy; apple cider vinegar is a fine substitute. Do not skip it, the sauce tastes flat without it.
1 tsp toasted sesame oil
Added at the end, off heat, so its fragrance survives. Toasted, not regular, sesame oil, they are entirely different products.
1 tbsp toasted sesame seeds and 2 thinly sliced scallions, for garnish
Toast seeds in a dry pan for 60 seconds if yours are raw; they go from fragrant to burnt fast. Chives are a softer substitute for scallions.
Tips & Tricks
Dry the Chicken Thoroughly
Pat every piece with paper towel until the surface feels tacky, not wet. Surface moisture is the number one reason chicken steams instead of crisping.
Do Not Crowd the Pan
Work in two batches if your skillet is smaller than 12 inches. Overlapping pieces drop the pan temperature and you lose the crust entirely.
Add the Glaze Off the Sear
Lower the heat before the honey goes in. Honey scorches above 350F (177C) and turns bitter in under a minute.
Rest Before Serving
Give the chicken 3 minutes off heat so the glaze sets and clings instead of running off the plate.
Pro Tips
Step-by-Step Instructions
1. Prep and Coat the Chicken
Pat the chicken pieces completely dry, season with the salt and pepper, then toss with the cornstarch in a bowl until every piece wears a thin, chalky white coat. Let them rest 10 minutes at room temperature while you mince the garlic and whisk the honey, soy sauce, and rice vinegar together in a small bowl.
2. Heat the Skillet
Set a 12-inch cast iron or heavy skillet over medium-high heat and add the oil. Wait until the oil shimmers and a single piece of chicken sizzles audibly on contact, roughly 2 to 3 minutes, which puts you near 375F (190C).
3. Sear the First Batch
Lay half the chicken in the pan in a single layer, leaving space between pieces. Sear undisturbed for 4 minutes, then flip and cook 3 minutes more, until both sides are deep golden brown and the internal temperature reads 165F (74C) on an instant-read thermometer. Move to a plate and repeat with the second batch.
4. Bloom the Garlic
Reduce the heat to medium-low, leaving about 1 tablespoon of oil in the pan, and add the minced garlic. Stir constantly for 30 seconds, just until it smells nutty and turns pale gold, not brown.
5. Build the Glaze
Pour in the honey-soy mixture and let it come to a gentle bubble, about 60 seconds. Stir with a spatula and watch for the sauce to thicken enough that it coats the back of a spoon and leaves a clear trail when you drag through it.
6. Return the Chicken
Slide all the seared chicken back into the pan along with any accumulated juices and toss for 2 minutes over low heat until every piece is lacquered and glossy. The glaze should cling, not pool.
7. Finish and Garnish
Turn off the heat, drizzle in the toasted sesame oil, and toss once more. Scatter the sesame seeds and sliced scallions over the top and serve immediately over steamed rice.
Delicious Variations
Spicy Gochujang Version
Whisk 1 tablespoon gochujang into the honey-soy glaze for a Korean-style kick that still keeps the sweet-savory balance.
Lemon Pepper Twist
Swap the rice vinegar for fresh lemon juice and add 1 teaspoon cracked black pepper to the glaze for a brighter, sharper profile.
Air Fryer Method
Coat the chicken as written, air fry at 400F (204C) for 12 minutes, then toss with a stovetop glaze for the same crisp result with less oil.
How to Store Crispy Honey Garlic Chicken in 30 Minutes
Refrigerator
Store in an airtight container for up to 4 days. The crust softens overnight, which is expected; the flavor actually deepens.
Freezer
Freeze the cooled chicken and glaze together for up to 3 months. Thaw overnight in the refrigerator before reheating.
Reheating
Reheat in a 375F (190C) oven or air fryer for 8 to 10 minutes to restore some crispness. Avoid the microwave, it turns the coating rubbery.
Frequently Asked Questions
Q: Why is my honey garlic chicken not crispy?
Moisture on the chicken surface is almost always the culprit. Pat the pieces bone-dry, coat them in cornstarch, and sear in a hot pan without crowding so they brown instead of steam.
Q: Can I use chicken breast instead of thighs?
Yes, but reduce the sear time by about a minute per side because breast dries out faster. Use 1 3/4 lb (800g) and check for 165F (74C) internal temperature to avoid overcooking.
Q: How do I stop the honey glaze from burning?
Add the honey mixture only after lowering the heat to medium-low and once the chicken is out of the pan. Honey scorches above 350F (177C), so the glaze stage should bubble gently, never smoke.
Q: Is this honey garlic chicken gluten free?
It is gluten free if you swap the soy sauce for tamari or coconut aminos. Everything else in the recipe, including the cornstarch and rice vinegar, is naturally gluten free.
Q: Can I make this ahead of time?
You can sear the chicken up to 2 days ahead and refrigerate it, then build the glaze and toss it fresh the day you serve. The glaze itself holds for a week in a sealed jar.
Give this Crispy Honey Garlic Chicken a spot in your weeknight rotation and notice how much calmer dinner gets when the pan count drops to one. Cook it twice, time it once, and it becomes automatic. Simplify, focus, thrive.
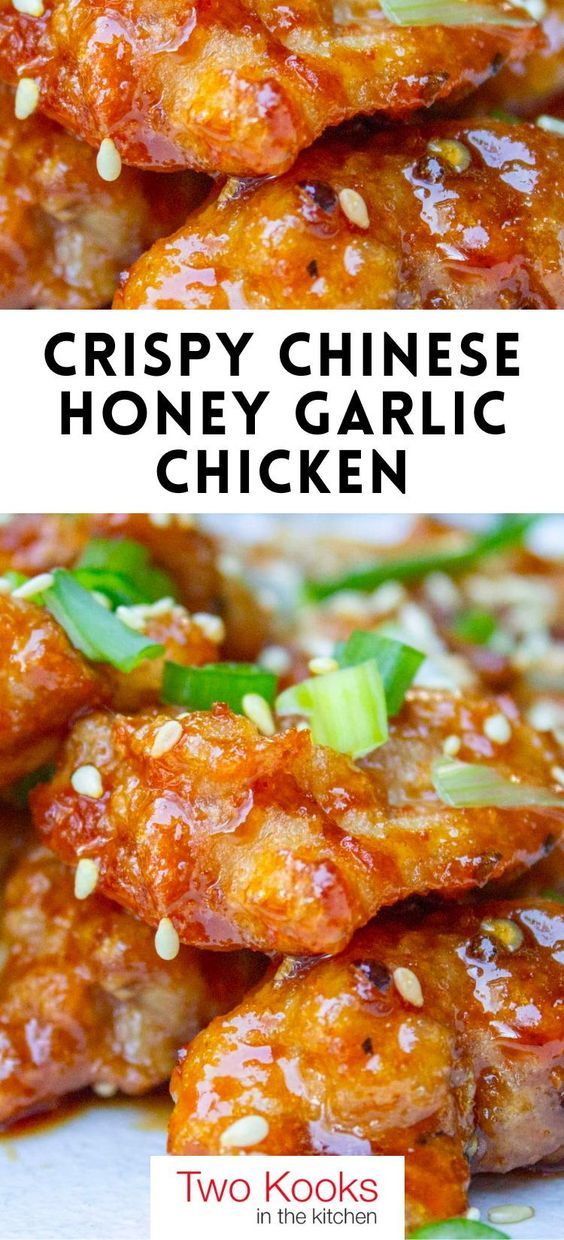
Crispy Honey Garlic Chicken in 30 Minutes
Crispy Honey Garlic Chicken in 30 Minutes delivers golden pan-seared chicken in a sticky honey garlic glaze with just one skillet and pantry staples.
🧂 Ingredients
- 2 lb (900g) boneless, skinless chicken thighs, cut into 1 1/2-inch pieces
- 1 1/2 tsp kosher salt
- 1/2 tsp freshly cracked black pepper
- 3 tbsp cornstarch
- 3 tbsp neutral oil, such as avocado or canola
- 6 cloves garlic, finely minced, about 2 tbsp
- 1/3 cup (113g) honey
- 3 tbsp low-sodium soy sauce
- 1 tbsp rice vinegar
- 1 tsp toasted sesame oil
- 1 tbsp toasted sesame seeds and 2 thinly sliced scallions, for garnish
📋 Instructions
- 1Prep and Coat the Chicken — Pat the chicken pieces completely dry, season with the salt and pepper, then toss with the cornstarch in a bowl until every piece wears a thin, chalky white coat. Let them rest 10 minutes at room temperature while you mince the garlic and whisk the honey, soy sauce, and rice vinegar together in a small bowl.
- 2Heat the Skillet — Set a 12-inch cast iron or heavy skillet over medium-high heat and add the oil. Wait until the oil shimmers and a single piece of chicken sizzles audibly on contact, roughly 2 to 3 minutes, which puts you near 375F (190C).
- 3Sear the First Batch — Lay half the chicken in the pan in a single layer, leaving space between pieces. Sear undisturbed for 4 minutes, then flip and cook 3 minutes more, until both sides are deep golden brown and the internal temperature reads 165F (74C) on an instant-read thermometer. Move to a plate and repeat with the second batch.
- 4Bloom the Garlic — Reduce the heat to medium-low, leaving about 1 tablespoon of oil in the pan, and add the minced garlic. Stir constantly for 30 seconds, just until it smells nutty and turns pale gold, not brown.
- 5Build the Glaze — Pour in the honey-soy mixture and let it come to a gentle bubble, about 60 seconds. Stir with a spatula and watch for the sauce to thicken enough that it coats the back of a spoon and leaves a clear trail when you drag through it.
- 6Return the Chicken — Slide all the seared chicken back into the pan along with any accumulated juices and toss for 2 minutes over low heat until every piece is lacquered and glossy. The glaze should cling, not pool.
- 7Finish and Garnish — Turn off the heat, drizzle in the toasted sesame oil, and toss once more. Scatter the sesame seeds and sliced scallions over the top and serve immediately over steamed rice.

Yuki writes about technology and digital minimalism, helping readers declutter their digital lives and use tech mindfully. She explores apps, tools, and habits that promote focus and well-being.