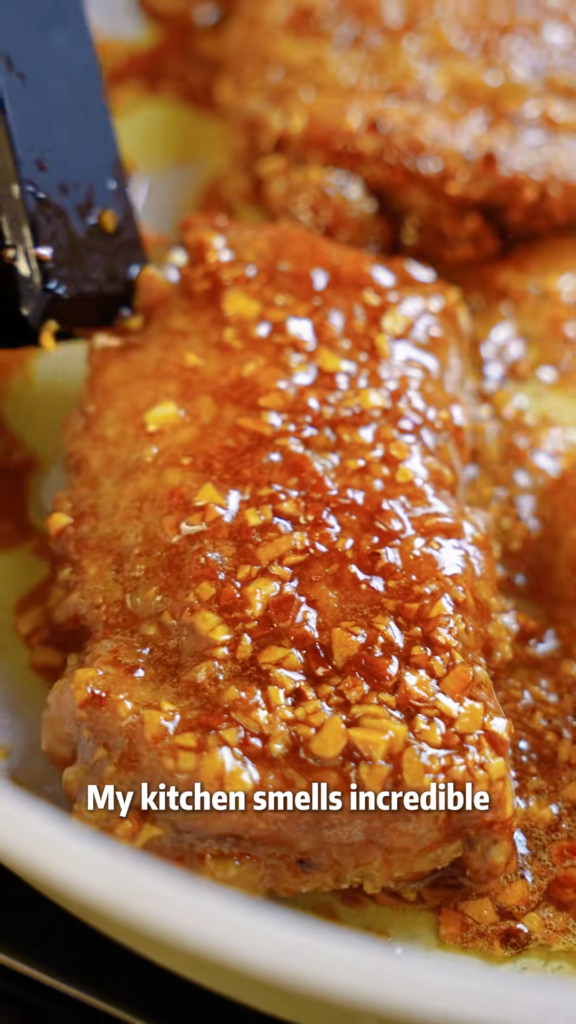
I first built this recipe on a windy ridge above a trout creek, using a beat-up camp skillet and a squeeze bottle of honey that had gone half-crystalline. The chicken came out so loud and crunchy that my hiking buddy stopped mid-sentence to ask what I was doing. Back home in a real kitchen it only got better, and now it's the meal I make when I want takeout energy without the 40-minute delivery wait.
Advertisements1
Here's the thing nobody tells you: crispy chicken is a timing game, not a talent game. Coat it, fry it at the right temperature, and glaze it at the very end so the sauce never has a chance to steam the crust soft. Get those three moves right and you're eating better than the strip-mall spot down the road.
Everything here is pantry-friendly and done in about 30 minutes of active work. If you've got a cast iron skillet, a thermometer, and a bottle of honey, you're already most of the way there.
Why You'll Love This Recipe
About the Ingredients
1 1/2 lbs (680g) boneless, skinless chicken thighs, cut into 1-inch chunks
Thighs stay juicy under high heat; chicken breast works too but cut it the same size and pull it 15 seconds earlier. Buy thighs that feel springy, not slimy, and check the sell-by date.
1/2 cup (65g) cornstarch
Cornstarch is the secret to a glassy, shattering crust. If you're out, potato starch is a 1:1 swap and fries even crisper.
1/4 cup (31g) all-purpose flour
Flour gives the coating body so it clings. A gluten-free 1:1 baking blend substitutes cleanly here.
1 tsp kosher salt, plus more to finish
Kosher salt seasons the coating evenly; if you only have table salt, use 3/4 tsp because it's much denser.
1/2 tsp freshly ground black pepper
Fresh-cracked pepper blooms in the hot oil. Pre-ground works in a pinch, just add an extra pinch.
1/3 cup (113g) honey
Real honey, not honey-flavored syrup, is what makes the glaze cling. Maple syrup is a solid swap if you want a darker, smokier finish.
3 tbsp low-sodium soy sauce
Low-sodium keeps the glaze from going salty as it reduces. Tamari or coconut aminos both work for gluten-free versions.
1 tbsp rice vinegar
The acid cuts the honey's sweetness. Apple cider vinegar substitutes 1:1; white vinegar is sharper, so use 2 tsp.
5 cloves garlic, finely minced (about 2 tbsp)
Fresh garlic is non-negotiable for that punchy aroma. Jarred minced garlic is fine but use 1 tbsp and add it later so it doesn't burn.
1 tsp grated fresh ginger
Ginger keeps the glaze from tasting flat. Ground ginger works at 1/4 tsp if that's what's in the cabinet.
1/4 tsp red pepper flakes
Optional heat that balances the sweet. Skip it for kids, or double it if you like a little burn.
1 cup (240ml) neutral oil for frying, such as peanut or canola
Peanut oil has the highest smoke point and a clean flavor; canola is cheaper and works great. Never fry in olive oil at this heat.
Tips & Tricks
Dry the chicken before you coat it
Pat the chunks completely dry with paper towels, then toss with the starch. Any surface moisture turns to steam and blows holes in your crust, which is the number one reason home-fried chicken comes out soggy.
Fry in two batches, always
Crowding the pan drops the oil temperature fast, and low oil means greasy, pale chicken. Give each batch room and let the oil climb back to 350F (175C) before the next round.
Glaze off the heat, and only at the end
Pull the pan off the burner, add the sauce, and toss for 20 seconds. Honey scorches fast and sauce left on heat will steam away the crunch you just built.
- Salt the chicken the second it leaves the oil: A pinch of kosher salt on hot, draining chicken sticks better and seasons all the way through the crust.
Pro Tips
Step-by-Step Instructions
1. Prep the chicken
Pat the chicken chunks bone-dry with paper towels, then season with 1 tsp kosher salt and the black pepper. Let them sit at room temperature for 10 minutes while you set up the coating; cold chicken drops your oil temperature.
2. Mix the coating
Whisk the cornstarch and flour together in a wide bowl. Add the chicken in batches and press the coating on with your fingers until every piece is fully dusted and no wet spots show.
3. Heat the oil
Pour 1 cup neutral oil into a deep skillet or wok and heat over medium-high to 350F (175C). Test with a pinch of coating: it should sizzle hard and rise within 2 seconds.
4. Fry the first batch
Lower half the chicken in one at a time and fry for 4 to 5 minutes, turning once, until deeply golden brown and floating. The internal temperature should hit 165F (74C) on an instant-read thermometer. Move to a wire rack.
5. Fry the second batch
Let the oil return to 350F (175C), then fry the remaining chicken the same 4 to 5 minutes. Drain on the rack and sprinkle with a pinch of kosher salt right away.
6. Build the glaze
Pour off all but 1 tbsp of oil and set the pan over medium heat. Add the garlic, ginger, and red pepper flakes and stir for 20 to 30 seconds until fragrant but not browned, about the color of light toast.
7. Finish the sauce
Stir in the honey, soy sauce, and rice vinegar and let it bubble for 60 to 90 seconds until it coats the back of a spoon and the edges look syrupy. Pull the pan off the heat immediately.
8. Toss and serve
Add the crispy chicken to the warm glaze and toss for 20 seconds until every piece is glossy. Serve right away over rice or noodles, with sesame seeds and sliced scallions if you've got them.
Delicious Variations
Spicy Honey Sriracha
Swap 1 tbsp of the honey for sriracha and add an extra 1/4 tsp red pepper flakes for a glaze with real heat.
Air Fryer Version
Spray the coated chicken with oil and air fry at 400F (204C) for 12 to 14 minutes, shaking halfway, then toss in the stovetop glaze.
Lemon Pepper Twist
Replace the rice vinegar with fresh lemon juice and add 1 tsp cracked black pepper to the coating for a brighter, sharper bite.
How to Store 30-Minute Honey Garlic Crispy Chicken | Better Than Takeout 🍗
Refrigerator
Store in an airtight container for up to 3 days. The crust softens, but the flavor deepens, and it's excellent chopped over salads.
Freezer
Freeze the fried, unglazed chicken in a single layer for 2 hours, then bag it for up to 2 months. Never freeze it after glazing, or the sauce turns watery.
Reheating
Reheat unglazed chicken at 400F (204C) for 8 to 10 minutes on a rack to re-crisp, then toss with freshly made glaze. In a microwave it will be tender but not crispy.
Frequently Asked Questions
Q: Why is my honey garlic chicken not crispy?
Your oil was too cool or the pan was too crowded. Fry at 350F (175C) in two batches, and glaze only after the chicken is out of the oil and off the heat. Moisture and low heat are the two enemies of crunch.
Q: Can I make this honey garlic chicken in an air fryer?
Yes, air fry the coated chicken at 400F (204C) for 12 to 14 minutes, shaking halfway. Spray the pieces lightly with oil first so the cornstarch coating actually browns instead of staying chalky.
Q: How do I keep the sauce from burning?
Add the honey mixture off direct high heat and only let it bubble for 60 to 90 seconds. Honey scorches above 350F (175C), so pull the pan the moment the glaze coats a spoon.
Q: Can I use chicken breast instead of thighs?
Absolutely, just cut it into even 1-inch chunks and fry for 3 to 4 minutes per batch. Breast dries out faster, so pull it as soon as it hits 165F (74C) internally.
Q: Is this honey garlic chicken gluten free?
It can be with two swaps: use a 1:1 gluten-free baking blend instead of flour and tamari or coconut aminos instead of soy sauce. Cornstarch and rice vinegar are already gluten free.
Give this one a shot on your next busy Tuesday and tell me it doesn't beat the delivery app. If you make it, snap a photo of that glossy glaze and tag me, and if you swap in the air fryer version, let me know how it turned out. Get out there and explore.
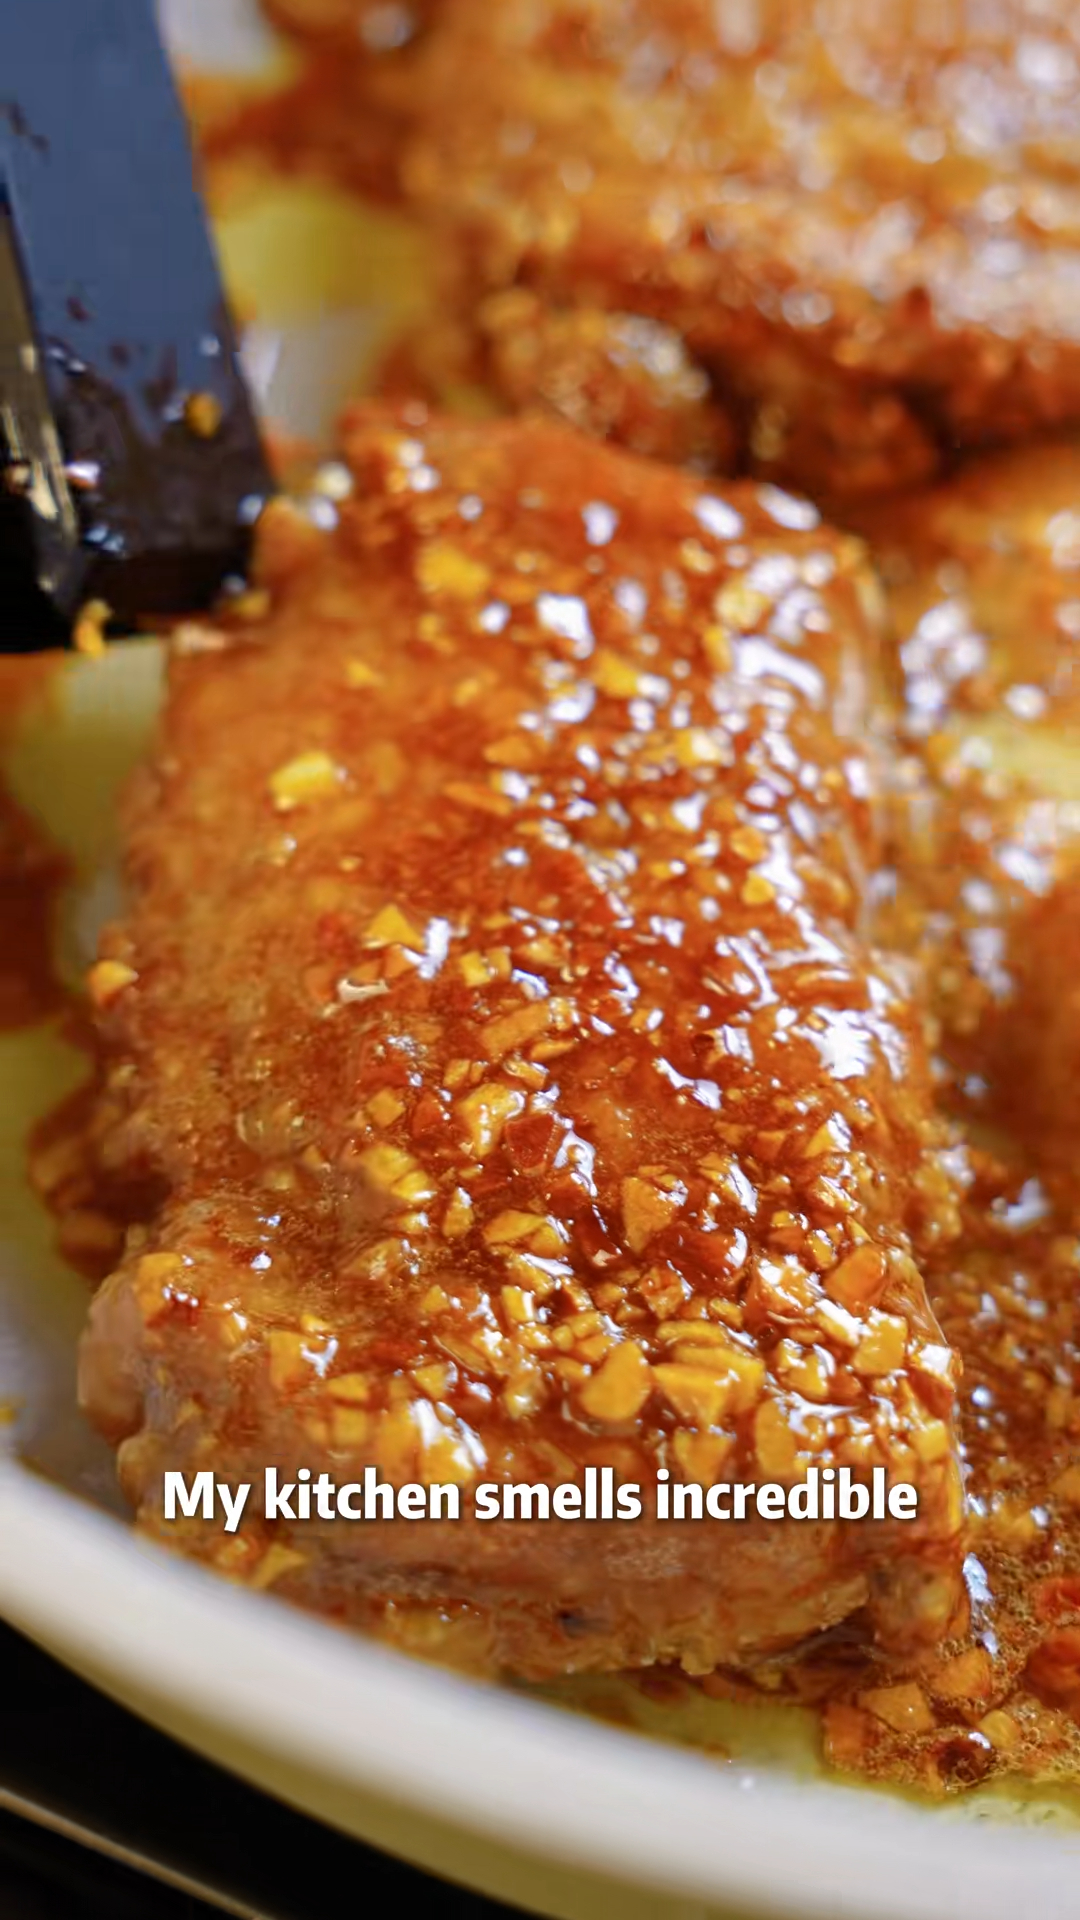
30-Minute Honey Garlic Crispy Chicken | Better Than Takeout 🍗
30-Minute Honey Garlic Crispy Chicken delivers shatter-crisp bites in a sticky sweet-savory glaze that beats takeout in half the time.
🧂 Ingredients
- 1 1/2 lbs (680g) boneless, skinless chicken thighs, cut into 1-inch chunks
- 1/2 cup (65g) cornstarch
- 1/4 cup (31g) all-purpose flour
- 1 tsp kosher salt, plus more to finish
- 1/2 tsp freshly ground black pepper
- 1/3 cup (113g) honey
- 3 tbsp low-sodium soy sauce
- 1 tbsp rice vinegar
- 5 cloves garlic, finely minced (about 2 tbsp)
- 1 tsp grated fresh ginger
- 1/4 tsp red pepper flakes
- 1 cup (240ml) neutral oil for frying, such as peanut or canola
📋 Instructions
- 1Prep the chicken — Pat the chicken chunks bone-dry with paper towels, then season with 1 tsp kosher salt and the black pepper. Let them sit at room temperature for 10 minutes while you set up the coating; cold chicken drops your oil temperature.
- 2Mix the coating — Whisk the cornstarch and flour together in a wide bowl. Add the chicken in batches and press the coating on with your fingers until every piece is fully dusted and no wet spots show.
- 3Heat the oil — Pour 1 cup neutral oil into a deep skillet or wok and heat over medium-high to 350F (175C). Test with a pinch of coating: it should sizzle hard and rise within 2 seconds.
- 4Fry the first batch — Lower half the chicken in one at a time and fry for 4 to 5 minutes, turning once, until deeply golden brown and floating. The internal temperature should hit 165F (74C) on an instant-read thermometer. Move to a wire rack.
- 5Fry the second batch — Let the oil return to 350F (175C), then fry the remaining chicken the same 4 to 5 minutes. Drain on the rack and sprinkle with a pinch of kosher salt right away.
- 6Build the glaze — Pour off all but 1 tbsp of oil and set the pan over medium heat. Add the garlic, ginger, and red pepper flakes and stir for 20 to 30 seconds until fragrant but not browned, about the color of light toast.
- 7Finish the sauce — Stir in the honey, soy sauce, and rice vinegar and let it bubble for 60 to 90 seconds until it coats the back of a spoon and the edges look syrupy. Pull the pan off the heat immediately.
- 8Toss and serve — Add the crispy chicken to the warm glaze and toss for 20 seconds until every piece is glossy. Serve right away over rice or noodles, with sesame seeds and sliced scallions if you've got them.

Liam writes about outdoor adventure and gear, focusing on budget-friendly options and safety. He tests equipment in real conditions and shares honest assessments for hikers and campers.