
Crispy chicken is one of those dinners that makes everyone at the table go quiet for a second, then ask for seconds. The problem is that most homemade versions go soggy the moment they hit the plate. This recipe fixes that with a cornstarch-and-flour coating, a buttermilk soak, and a two-stage fry that locks in juice and builds a crust you can actually hear.
Advertisements1
I tested this one on a Tuesday night with two hungry kids circling the stove, and it held its crunch through the whole meal, even the pieces that sat on the counter while I finished the last batch. That never happens with plain flour dredges.
You do not need a deep fryer or a restaurant setup. A heavy pot, a thermometer, and about 45 minutes of your evening get you there. Small steps, big impact.
Why You'll Love This Recipe
About the Ingredients
2 1/2 lbs (1.1 kg) bone-in, skin-on chicken thighs and drumsticks
Bone-in dark meat stays juicier than breast and fries more evenly. If you only have boneless thighs, reduce the fry time by about 4 minutes and check at 160F.
1 1/2 cups (360 ml) buttermilk
Buttermilk tenderizes and helps the coating cling. No buttermilk? Stir 1 1/2 tablespoons lemon juice into 1 1/2 cups whole milk and let it sit 10 minutes.
1 cup (125 g) all-purpose flour
Standard flour forms the base of the dredge. A cup-for-cup gluten-free blend works here too, though the crust browns a touch faster.
1/2 cup (60 g) cornstarch
Cornstarch is the real magic, it fries into a glassy, brittle shell. Do not swap it for more flour or you lose the crunch.
2 teaspoons smoked paprika
Smoked paprika adds color and a gentle smoky depth. Sweet paprika works if smoked is out of stock.
2 teaspoons garlic powder
Granulated garlic seasons the crust evenly. Garlic salt is fine, just cut the added salt to 1 teaspoon.
1 1/2 teaspoons kosher salt, plus more for finishing
Kosher salt flakes season better than fine table salt. If using table salt, start with 1 teaspoon.
1 teaspoon freshly ground black pepper
Fresh-cracked pepper tastes brighter than pre-ground. Add a pinch of cayenne here if you like heat.
1 teaspoon baking powder
Baking powder creates tiny bubbles in the crust that crisp fast. Use aluminum-free so it does not taste metallic.
6 cups (1.4 L) neutral oil, such as peanut or canola, for frying
Peanut oil has a high smoke point and mild flavor. Canola or vegetable oil both work fine.
1 lemon, cut into wedges, for serving
A squeeze of lemon cuts the richness. Pick a lemon that feels heavy for its size, that means more juice.
Tips & Tricks
- Do not crowd the pot. Fry in batches of 4 to 5 pieces so the oil temperature does not drop below 325F, which is what makes crusts greasy.
- Pat the chicken bone-dry before the buttermilk soak. Surface moisture is the number one reason coatings slide off.
- Let the coated pieces rest 10 minutes on a wire rack before frying. The dredge hydrates and sticks instead of falling into the oil.
- Use a thermometer, not the clock. Oil at 350F and chicken at 165F internal are the only numbers that matter here.
Pro Tips
Step-by-Step Instructions
1. Dry and soak the chicken
Pat the chicken completely dry with paper towels, then submerge it in the buttermilk in a bowl or zip-top bag. Refrigerate for at least 30 minutes and up to 8 hours so the meat tenderizes and the coating clings.
2. Mix the dredge
Whisk the flour, cornstarch, smoked paprika, garlic powder, kosher salt, black pepper, and baking powder in a wide shallow dish until no streaks remain. The baking powder is what makes the crust bubble and crisp.
3. Heat the oil
Pour 2 inches of oil into a heavy Dutch oven and clip on a thermometer. Heat over medium-high to 350F (175C), which takes about 8 to 10 minutes. The oil is ready when a pinch of flour sizzles immediately on contact.
4. Dredge and rest
Lift each piece from the buttermilk, letting excess drip off, then press it firmly into the flour mix on all sides. Set the coated pieces on a wire rack and rest 10 minutes so the coating sets.
5. Fry the first batch
Lower 4 to 5 pieces into the oil skin-side down and fry at 325F to 350F (163C to 175C) for 12 to 14 minutes, turning every 4 minutes, until deep golden brown and the internal temperature reads 165F (74C) at the thickest part.
6. Drain and season
Transfer the finished pieces to a clean wire rack and sprinkle immediately with kosher salt while the crust is still hot and glistening. Repeat frying with the remaining batches, letting the oil return to 350F between batches.
7. Rest and serve
Let the chicken rest 5 minutes so the juices settle, then serve with lemon wedges. Squeeze the lemon over the top right before eating, it wakes up the whole crust.
Delicious Variations
Nashville Hot
Whisk 3 tablespoons of the hot frying oil with 1 tablespoon cayenne and 1 teaspoon brown sugar, then brush it over the finished pieces.
Parmesan Herb
Add 1/3 cup grated Parmesan and 1 tablespoon dried Italian herbs to the flour mix for a savory, cheesy crust.
Air Fryer Version
Spray the coated pieces generously with oil and air fry at 380F (193C) for 22 to 25 minutes, flipping halfway, for about 80 percent of the crunch with far less oil.
How to Store Crispy Magic: Irresistible Crispy Chicken Recipes You'll Love! 🍗😍
Refrigerator
Store cooled chicken in an airtight container in the refrigerator for up to 4 days. Keep it in a single layer if you can so the crust does not steam.
Freezer
Freeze fully cooled pieces on a sheet pan for 1 hour, then transfer to a freezer bag for up to 3 months. Thaw overnight in the refrigerator before reheating.
Reheating
Reheat on a wire rack over a sheet pan at 400F (204C) for 12 to 15 minutes. Skip the microwave, it turns the crust rubbery in under a minute.
Frequently Asked Questions
Q: Why does my fried chicken coating fall off?
Moisture is almost always the culprit, so pat the chicken bone-dry before the buttermilk soak and let the coated pieces rest 10 minutes before frying. Pressing the flour mix firmly into the meat also helps it bond. If pieces still shed coating, your oil may be too cool.
Q: What is the best oil temperature for frying chicken?
Hold the oil between 325F and 350F (163C to 175C) for the entire fry. Hotter oil browns the crust before the inside cooks, and cooler oil soaks in and makes the chicken greasy. Use a clip-on thermometer and adjust the burner as you go.
Q: How do I know when fried chicken is done?
A digital thermometer inserted into the thickest part of the thigh or drumstick should read 165F (74C). The crust should be deep golden brown and the juices should run clear when you pierce the meat near the bone. Dark meat can safely go to 175F for even more tender results.
Q: Can I make this crispy chicken in an air fryer?
Yes, spray the coated pieces generously with oil and air fry at 380F (193C) for 22 to 25 minutes, flipping halfway through. The crust will be crisp but slightly less shattery than deep-fried. Bone-in pieces need the full time, so do not pull them early.
Q: How do I keep fried chicken crispy for leftovers?
Cool it completely on a wire rack, then refrigerate it uncovered for 30 minutes before sealing the container so trapped steam escapes. Reheat at 400F (204C) on a rack for 12 to 15 minutes and it comes back surprisingly crisp.
Give this one a shot on your next busy weeknight and tell me how the crust turned out, I read every comment. If you want more dinners that actually work on a Tuesday, subscribe and grab the free 15-minute meal plan in the sidebar. Small steps, big impact.
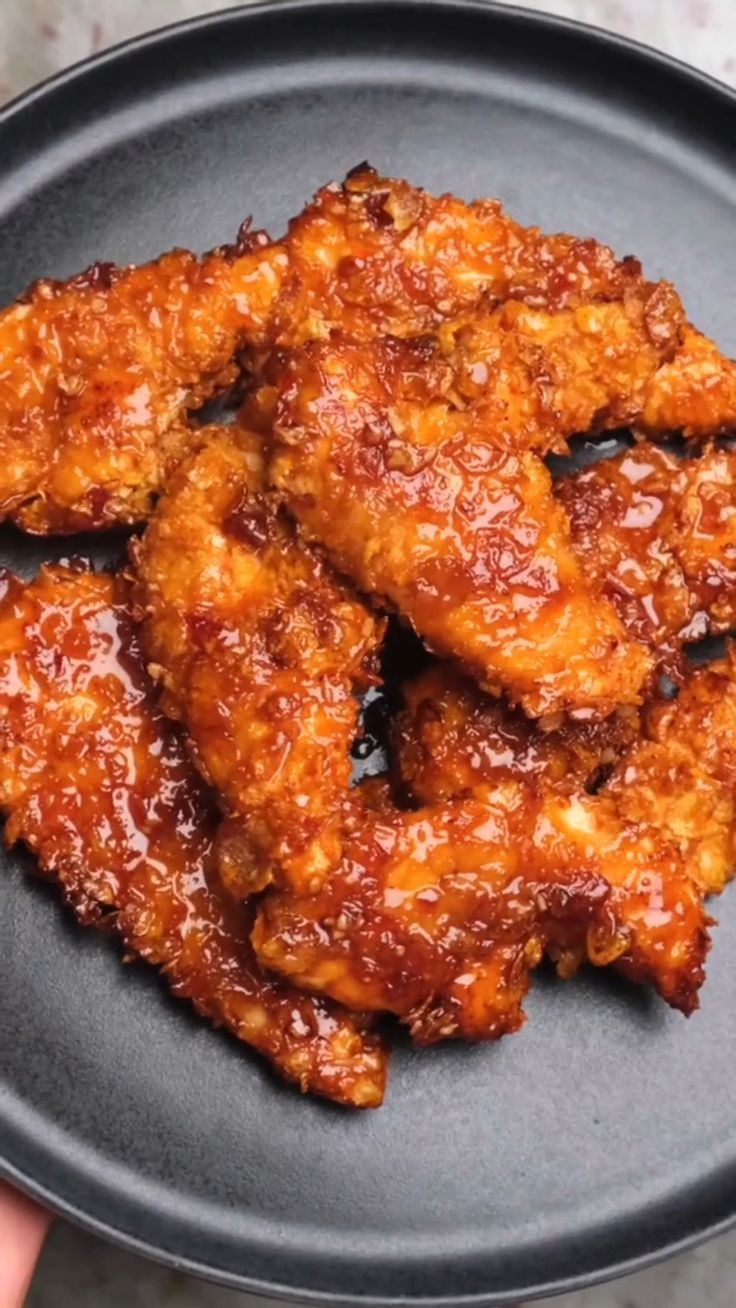
Crispy Magic: Irresistible Crispy Chicken Recipes You'll Love! 🍗😍
Crispy Magic Chicken delivers shatteringly crunchy, juicy chicken in 45 minutes with a seasoned cornstarch crust that stays crisp long after frying.
🧂 Ingredients
- 2 1/2 lbs (1.1 kg) bone-in, skin-on chicken thighs and drumsticks
- 1 1/2 cups (360 ml) buttermilk
- 1 cup (125 g) all-purpose flour
- 1/2 cup (60 g) cornstarch
- 2 teaspoons smoked paprika
- 2 teaspoons garlic powder
- 1 1/2 teaspoons kosher salt, plus more for finishing
- 1 teaspoon freshly ground black pepper
- 1 teaspoon baking powder
- 6 cups (1.4 L) neutral oil, such as peanut or canola, for frying
- 1 lemon, cut into wedges, for serving
📋 Instructions
- 1Dry and soak the chicken — Pat the chicken completely dry with paper towels, then submerge it in the buttermilk in a bowl or zip-top bag. Refrigerate for at least 30 minutes and up to 8 hours so the meat tenderizes and the coating clings.
- 2Mix the dredge — Whisk the flour, cornstarch, smoked paprika, garlic powder, kosher salt, black pepper, and baking powder in a wide shallow dish until no streaks remain. The baking powder is what makes the crust bubble and crisp.
- 3Heat the oil — Pour 2 inches of oil into a heavy Dutch oven and clip on a thermometer. Heat over medium-high to 350F (175C), which takes about 8 to 10 minutes. The oil is ready when a pinch of flour sizzles immediately on contact.
- 4Dredge and rest — Lift each piece from the buttermilk, letting excess drip off, then press it firmly into the flour mix on all sides. Set the coated pieces on a wire rack and rest 10 minutes so the coating sets.
- 5Fry the first batch — Lower 4 to 5 pieces into the oil skin-side down and fry at 325F to 350F (163C to 175C) for 12 to 14 minutes, turning every 4 minutes, until deep golden brown and the internal temperature reads 165F (74C) at the thickest part.
- 6Drain and season — Transfer the finished pieces to a clean wire rack and sprinkle immediately with kosher salt while the crust is still hot and glistening. Repeat frying with the remaining batches, letting the oil return to 350F between batches.
- 7Rest and serve — Let the chicken rest 5 minutes so the juices settle, then serve with lemon wedges. Squeeze the lemon over the top right before eating, it wakes up the whole crust.

Maya writes about sustainable living and zero-waste practices, focusing on small, actionable changes that fit into busy routines. She shares practical tips from her own journey of reducing waste at home and in the community.